Hello Crafters!
I know it’s been a very long time since I did a blog post. I decided to start blogging again because I have missed it.
So let’s catch up! What have you guys been up to? What are you guys crafting these days? Are you guys loving the 2nd Saleabration this year that Stampin’ up! has offered us?
I have taken full advantage of all the free items! I fell in love with all the freebies not to mention all the items in the mini catalog. I have been playing with so many of the stamp sets and dies when I can find the time.
I want to share with you my latest card and how I created this one.

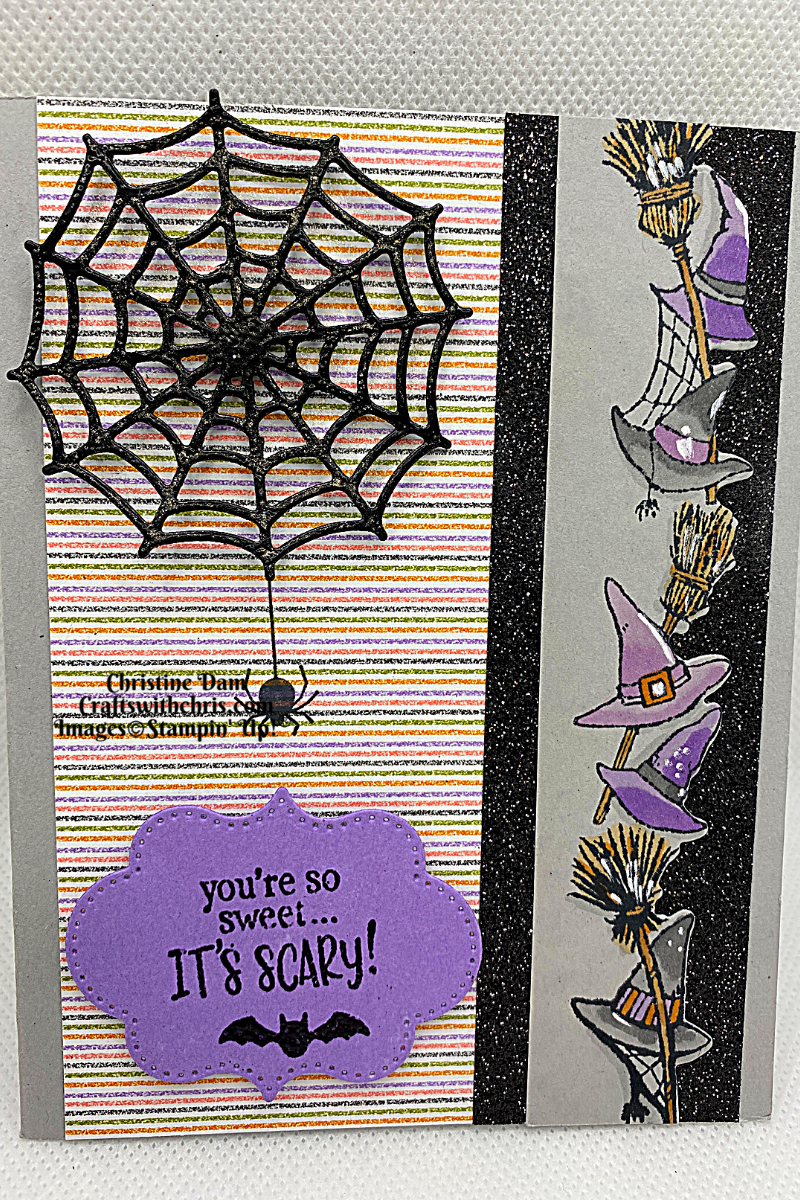
I am in a group with other Stampin’ Up! demonstrators and we do a card swap once a month. Our theme was fall or Halloween this month. Of course, if you know me you know I LOVE Halloween so this one was so easy for me. I often google the stamp set I am using to get ideas. I find a similar card online by another Demonstrator and I put my spin on it. I was most drawn to the card edge. I loved the coloring also the added white to the card. So I knew I had to recreate that part on my card design.
There are two different stamp sets and two different dies used on this card. I used the Frightfully Cute Bundle and the Festive and Bright Bundle.
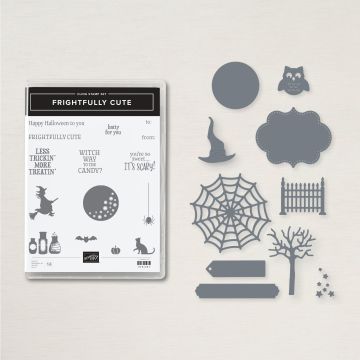
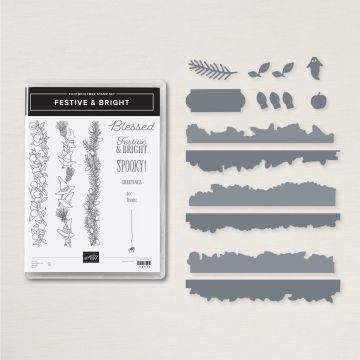
Frightfully Cute is totally Halloween but there are some cute tags with the dies that you could use any time. Festive and Bright is for fall, Halloween and Christmas.
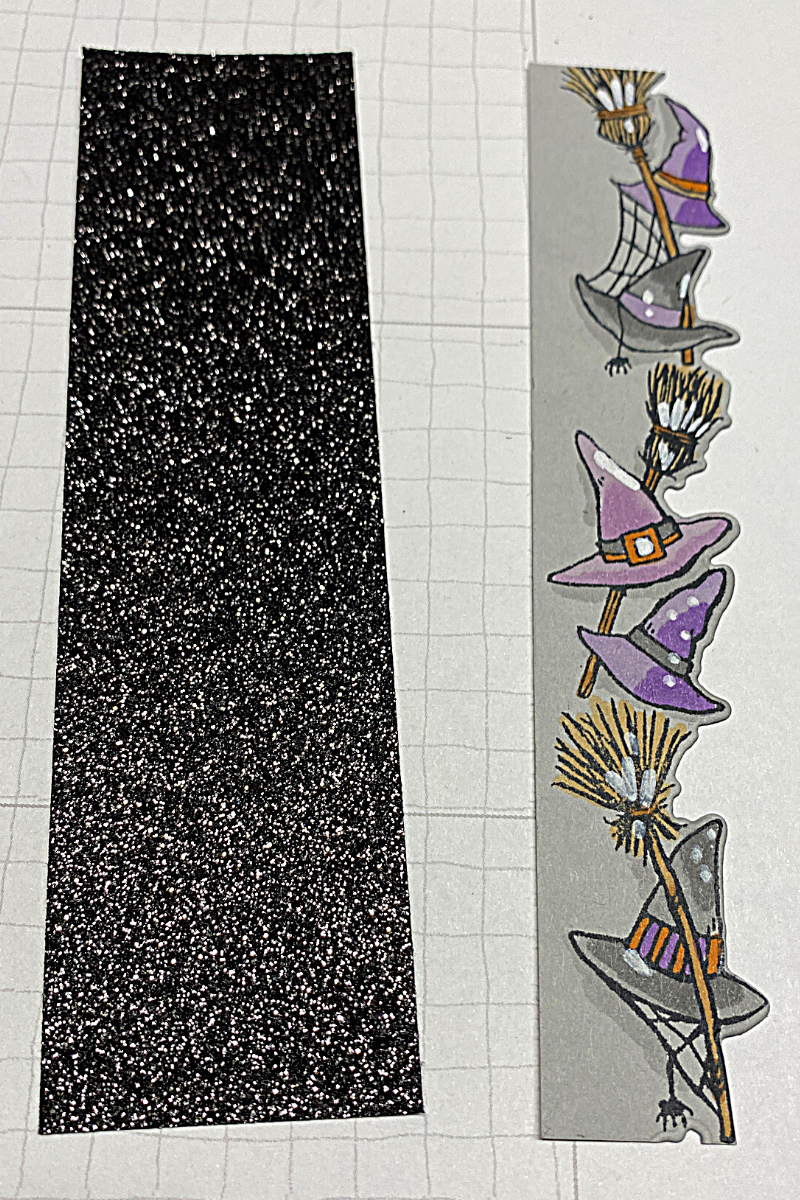
I cut a piece of Smoky Slate at 1 inch by 5 1/2inch and then stamped the witch hats close to one side. I used the die to cut the edge. I used a variety of Stampin’ Blends to add color. You can see that I used smoky slate to give the hats and brooms some shading. I also used the Stampin’ Chalk Marker to add white highlights to the hats and brooms. The Glitter paper was cut 1 1/2 inches by 5 1/2 inches. I then used multipurpose liquid glue to secure the hats to the glitter paper.
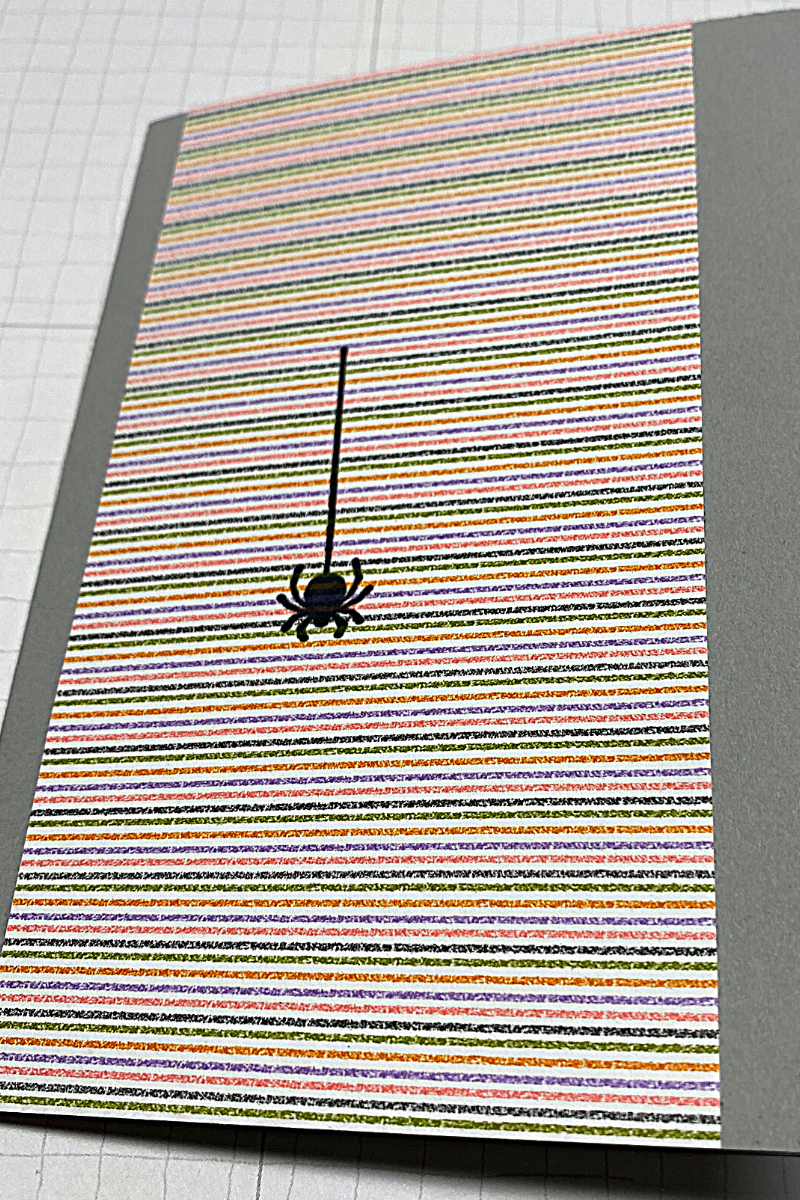
I cut a piece of the Cute Halloween DSP 3 inches by 5 1/2 inches and then stamped the spider out of the Frightfully Cute stamp set. I used the stamparatus to get a bold spider image. I then glued it onto a piece of Smokey slate Card Base. This is a 5 by 7 card size.
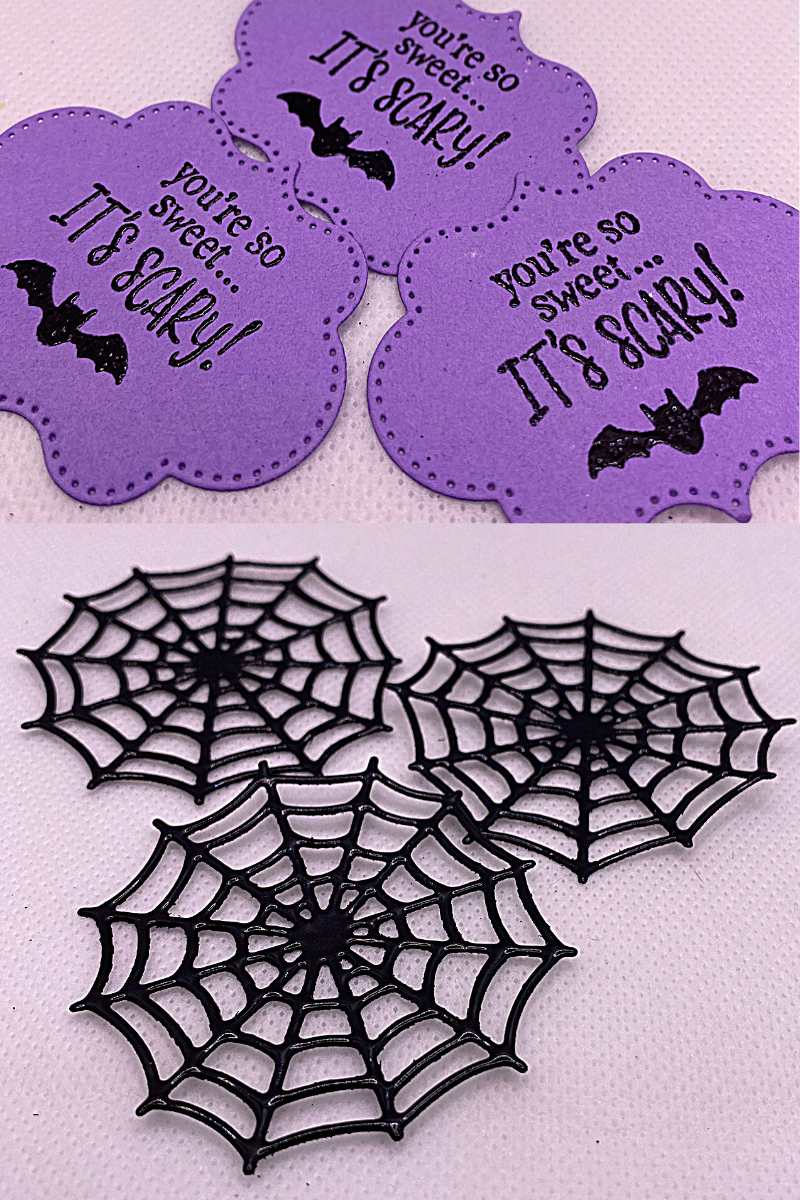
I used Highland Heather to cut the tag shape out. I embossed the sentiment and bat with basic black embossing powder. The spiderwebs were die cut with basic black cardstock and then I dipped them into the Versa Mark ink pad and then used the black embossing powder on them. It did this process twice and they look like embellishments. This is a great technique with any of your die cuts or punches.
I popped up the spider web with a black mini dimensional and I used regular Stampin dimensionals to pop up the sentiment. Of course, don’t forget to use a piece of Basic white to layer on the inside for a place to write. I always finish off my cards with a piece cut 5 1/4 inches by 4 inches of either basic white or very vanilla.
I hope you guys enjoyed this post and the process I used to create this Halloween card.
Happy Thursday!!!
Product List  |  | |
 | ||
 | ||
 | ") |  |
 | ||
 |  | |
 |  | |
 |  |  |
 |  |
 Designer Series Paper")


